
In this one we’ll show you how to add a custom column in the Orders table in WooCommerce Admin dashboard. This way you can easily add and view order meta (or custom field) information you need at glance, without viewing the order itself.
This tutorial has two parts. First off we’ll add the column in the WooCommerce admin order view table. Then we’ll populate the meta info in it.
PHP Snippet: Add custom column to WooCommerce admin orders list
In order to add a new column in the orders table, we’ll use the manage_edit-shop_order_columns filter. In your child theme’s functions.php file add the following code:
					function webroom_add_order_new_column_header( $columns ) {

    $new_columns = array();

    foreach ( $columns as $column_name => $column_info ) {

        $new_columns[ $column_name ] = $column_info;

        if ( 'order_total' === $column_name ) {
            $new_columns['order_details'] = __( 'Details', 'my-textdomain' );
        }
    }

    return $new_columns;
}
add_filter( 'manage_edit-shop_order_columns', 'webroom_add_order_new_column_header', 20);
Now, we’ve created a new column named “Details”. You can choose a name of your own. Remember to change both ‘order_details’ and ‘Details’ in the above code. We’ve placed the column ‘Details’ right after the Total column.
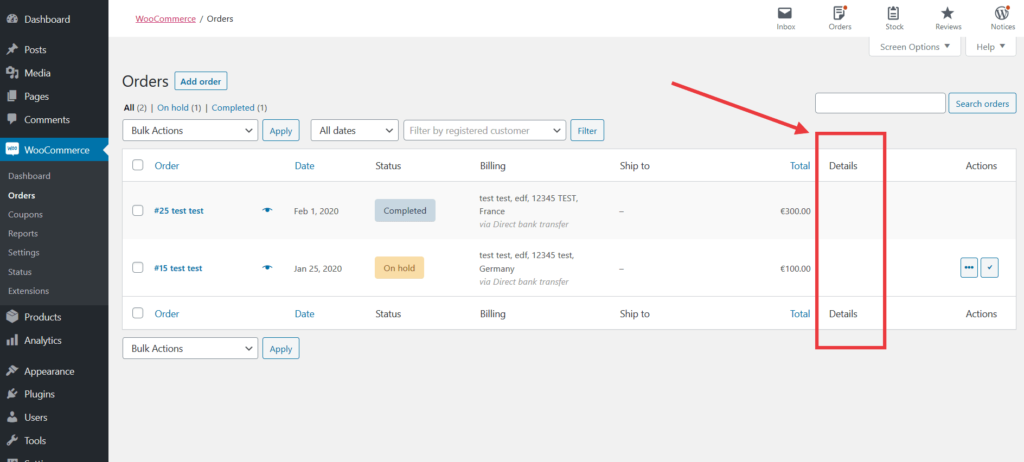
Now It’s empty so lets add some data.
PHP Snippet: add order meta data in WooCommerce admin orders table
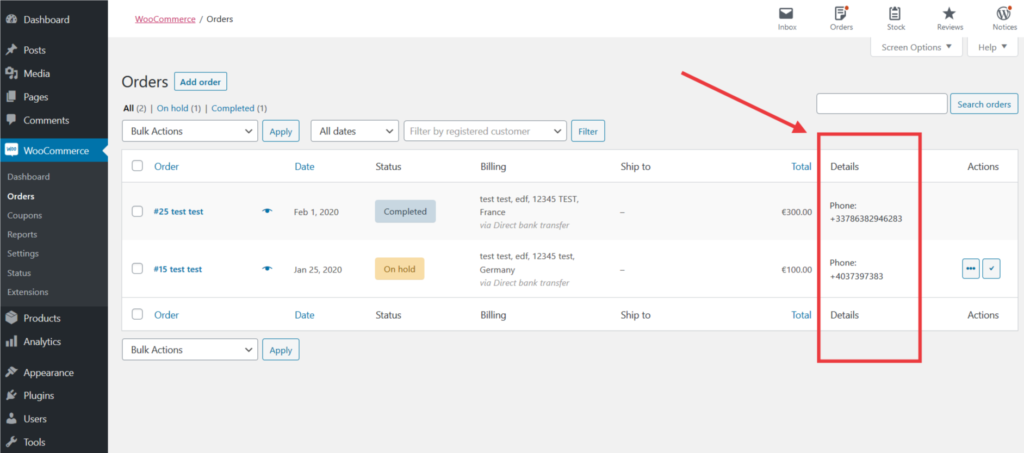
For demo purpose we’ll add the billing phone to the custom column. In functions.php add the following snippet:
					add_action( 'manage_shop_order_posts_custom_column', 'webroom_add_wc_order_admin_list_column_content' );

function webroom_add_wc_order_admin_list_column_content( $column ) {

    global $post;

    if ( 'order_details' === $column ) {

        $order = wc_get_order( $post->ID );
        echo '<p>Phone: ' . $order->get_billing_phone() . '</p>';

    }
}
Here you have to change ‘order_details’ according to the first snippet which creates the column. The next thing to change is the echo part where we actually display the desired order data (or any data we want). In the example we are showing the billing phone.
PHP Snippet: show order private notes in WooCommerce admin orders table
Here is how to show order Private notes:
					<?php
add_action( 'manage_shop_order_posts_custom_column', 'webroom_add_wc_order_admin_list_column_content' );

function webroom_add_wc_order_admin_list_column_content( $column ) {

    global $post;

    if ( 'order_details' === $column ) {

        $order = wc_get_order( $post->ID );
        $args = array(
            'order_id' => $post->ID,
        );

  		$notes = wc_get_order_notes( $args );
        foreach ( $notes as $note ) {
            $css_class   = array( 'note' );
            $css_class[] = $note->customer_note ? 'customer-note' : '';
            $css_class[] = 'system' === $note->added_by ? 'system-note' : '';
            $css_class   = apply_filters( 'woocommerce_order_note_class', array_filter( $css_class ), $note );
            ?>
            <li rel="<?php echo absint( $note->id ); ?>" class="<?php echo esc_attr( implode( ' ', $css_class ) ); ?>">
                <div class="note_content">
                    <?php echo wpautop( wptexturize( wp_kses_post( $note->content ) ) ); // @codingStandardsIgnoreLine ?>
                </div>
                <p class="meta">
                    <abbr class="exact-date" title="<?php echo esc_attr( $note->date_created->date( 'Y-m-d H:i:s' ) ); ?>">
                        <?php
                        /* translators: %1$s: note date %2$s: note time */
                        echo esc_html( sprintf( __( '%1$s at %2$s', 'woocommerce' ), $note->date_created->date_i18n( wc_date_format() ), $note->date_created->date_i18n( wc_time_format() ) ) );
                        ?>
                    </abbr>
                    <?php
                    if ( 'system' !== $note->added_by ) :
                        /* translators: %s: note author */
                        echo esc_html( sprintf( ' ' . __( 'by %s', 'woocommerce' ), $note->added_by ) );
                    endif;
                    ?>
                    <a href="#" class="delete_note" role="button" rel="nofollow ugc"><?php esc_html_e( 'Delete note', 'woocommerce' ); ?></a>
                </p>
            </li>
            <?php
        }

    }
}
We hope this article helped you learn how to change the sender’s name and email address in outgoing WordPress emails.
So that’s it for now, Hope you guys like this. We will come up with another blog post soon. Contact us for any query. Follow us on Facebook